
Build a delivery strategy for PHP using Docker and Jenkins, Part 2
Posted on October 8, 2017 • 9 minute read
Continuous Integration and Delivery are often thrown-around as buzzwords or lofty goals, but in practice can be applied quite simply. Continuous Integration is simply the practice of merging all developer code to a shared branch, "continuously". I quote "continuously" because this might be several times a day, per-commit, or once a day. It depends on what your team's goals are. We'll get more into that shortly. Continuous Delivery is an approach to building software that can be reliably released at any time. Note that this is not to be confused with Continuous Deployment. However, I feel it is a reasonable pre-cursor to achieving it.
You may already be doing CI/CD without all the fancy toys. If it's providing value to stakeholders, keep it up! At the end of the day, the focus should be on providing and maintaining value to customer, not an opportunity to flaunt how many different technologies your team strung together to copy files from source to destination. That said, if you're getting started, I hope to provide you with some food for thought and end this series with something that will work (and require adjustment for your team's needs) for a simple PHP project with basic unit tests.
The first thing to consider is, "How do we currently deliver software and where are the pain-points?". Work with your team to come up with a strategy that fits.
What's your team like?
Is your team contiguously located such that any question is a peek-around-the-corner away? Is your organization remote, taking advantage of chat clients, GitHub issues to maintain effective collaboration? Are you some mix in-between?
How does development occur?
Are we working in production? Are we developing locally? Vagrant? Docker? Valet? Are we using Git repositories and deploying manually after testing on our laptops? Are we testing? Are we doing code reviews or applying code style guidelines? What is our "definition of done" or criteria for "good enough to deploy"?
Who deploys?
Can anybody deploy? How do we do it? This all seems like a lot to ask, but it is critically important to have a baseline of shared understanding to work from.
Think through all of this stuff. To be honest, the answers don't matter. There are no pop-quizzes. The process of thinking about these things is most important. Above all else...
Start simple! If you're currently working in production (it happens all the time), don't try to jump straight for automated deployment. Consider moving your work into a version control system. Git and GitHub are great. Take steps to ensure that at all points, you have something that works for your customers and for your team. Your story is your own, not anybody else's. Don't make the mistake of feeling like "it worked for Spotify, so we should do it". Take inspiration, but temper that with your own experiences. Success is not a checklist; it is a continuous process.
With all that preamble, consider the following story that we'll be building for over the next few posts...
We are an all-remote organization with employees across several time-zones. We use Git for version control. Our code is hosted on GitHub.com in an organization we created. When developers work on a feature, they create a branch focused on that work on the upstream repository (no forks). When ready, they send a pull request to the
masterbranch. We get together and have "merge parties" every Friday where we review all open pull requests and merge. To merge a pull request, tests must pass and code must adhere to a style guide we keep internally. Once we've merged all open pull requests, we testmasterone last time and if it passes, we deploy by SSH-ing to our production servers and pulling themasterbranch, updating dependencies and running database migrations.Quite often, we'll run into issues where after merging a pull request, another is put into a conflicted state and can not be merged without additional work. This kills the momentum of our Friday meetings. Additionally, for each pull request, we have to
checkoutthe work, start with a clean database, and execute the test suite. After you've done a few of these, you make less mistakes, but it is tedious none-the-less. Code style fixes are a recurring issue during Friday meetings that also kill momentum. We would really prefer that developers, no matter where they are, know when apushto their branches "breaks the build". By knowing sooner, the hope is that as many issues are resolved as possible before our merge meetings. Lastly, we only allow a few folks to deploy releases. This is because it's easy to make a mistake and run the wrong migrations or accidentally execute database seeds used during testing. If those folks are out, we wait to deploy until Monday.~ Company X
The first thing to note here is that this team is perfectly healthy and quite honestly, likely beyond the norm. They have a means of delivering value consistently and are capable of honest critique of their own processes. If your team is already here, great. If not, you'll want to focus on building a culture of self-introspection. In order to succeed, your team must be able to see its flaws. That said, catch up on version control using Git, creating organizations on GitHub and a branching methodology called GitHub Flow that is similar to what the team above is doing.
I've created a new organization at https://github.com/php-delivery, where we'll host our sample application. Let's install and configure Jenkins BlueOcean to be able to deploy changes to our application.
Based on Docker...
Create a Dockerfile that extends jenkinsci/blueocean. We're doing this in case we ever want to make changes to plugins installed or to script the initial setup (which we'll be doing manually in this post).
gid for the docker group on my host and the BlueOcean image do not match.FROM jenkinsci/blueocean
# As root...
USER root
# Update packages, remove guest user, add new group for docker and put jenkins in it
RUN echo http://dl-2.alpinelinux.org/alpine/edge/community/ >> /etc/apk/repositories \
&& apk --no-cache add shadow \
&& userdel guest \
&& groupdel users \
&& groupmod -g 100 docker \
&& usermod -aG docker jenkins
# Switch back to jenkins user.
USER jenkins
Since we'll be running multiple services, create a docker-compose.yml file.
version: '3'
services:
  jenkins:
    build: .
    ports:
      - "80:8080"
      - "50000:50000"
    volumes:
      - /var/run/docker.sock:/var/run/docker.sock
This will use the Dockerfile we created to build our image. Additionally, we forward port 80 on the host to 8080 in the Jenkins container. Lastly, we share the host's Docker daemon UNIX socket with the container so that Jenkins can start containers during builds. This is more or less an implementation detail. If you don't run Jenkins in a container, you could just install Docker, as usual, and grant the jenkins user appropriate access (sudo or membership in the docker group).
Start it up!
Run docker-compose up and wait a few minutes while images are downloaded and the container boots. Eventually, you'll see output that includes the initial administrative password:
jenkins_1  | ***************************************************
jenkins_1  | ***************************************************
jenkins_1  | ***************************************************
jenkins_1  |
jenkins_1  | Jenkins initial setup is required. An admin user
jenkins_1  | has been created and a password generated. Please
jenkins_1  | use the following password to proceed to
jenkins_1  | installation:
jenkins_1  |
jenkins_1  | ad3b946c105e4ef0b77f873a045cfc23
jenkins_1  |
jenkins_1  | This may also be found at:
jenkins_1  | /var/jenkins_home/secrets/initialAdminPassword
jenkins_1  |
jenkins_1  | ***************************************************
jenkins_1  | ***************************************************
jenkins_1  | ***************************************************
Visit http://your-docker-host-ip (http://192.168.99.100 for me), paste the initial admin password and continue. When prompted, install the suggested plugins. Create the first admin user, save and finish. Ultimately, you'll land on the Jenkins Dashboard.
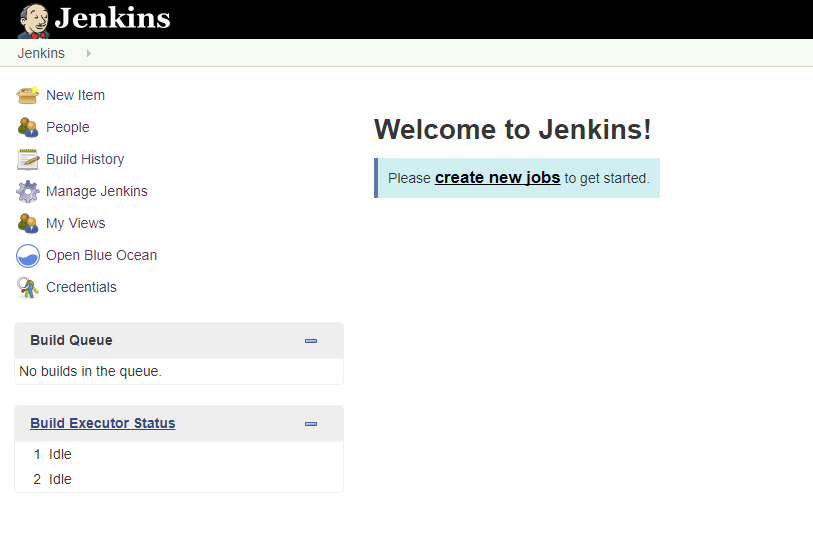
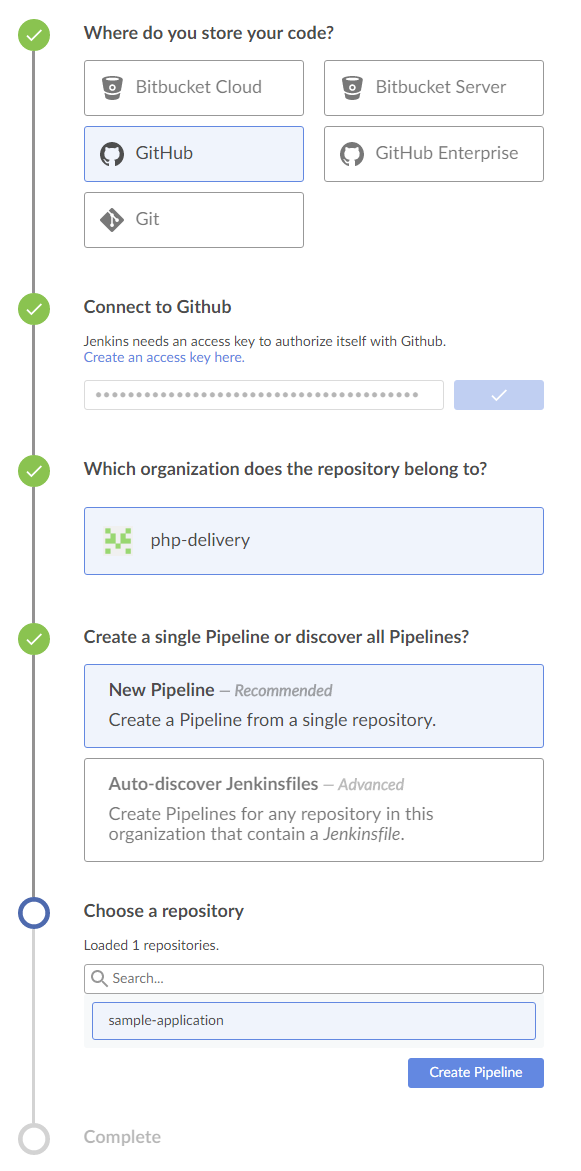
Click "Open Blue Ocean". Doing so kind-of switches gears to a more modern (and opinionated) user experience that we'll be taking advantage of. At the core of BlueOcean is the build Pipeline, which represents the journey of an individual contribution along a specified build path (e.g. test, stage, deploy, etc.) To get started, click "Create a new Pipeline". We're hosting our code on GitHub, but you can also use Bitbucket, GitHub Enterprise, or your own private git repository elsewhere. For GitHub, BlueOcean is going to need a personal access token to interact with our organization's repositories. The interactive wizard will guide you through setting all of that up.
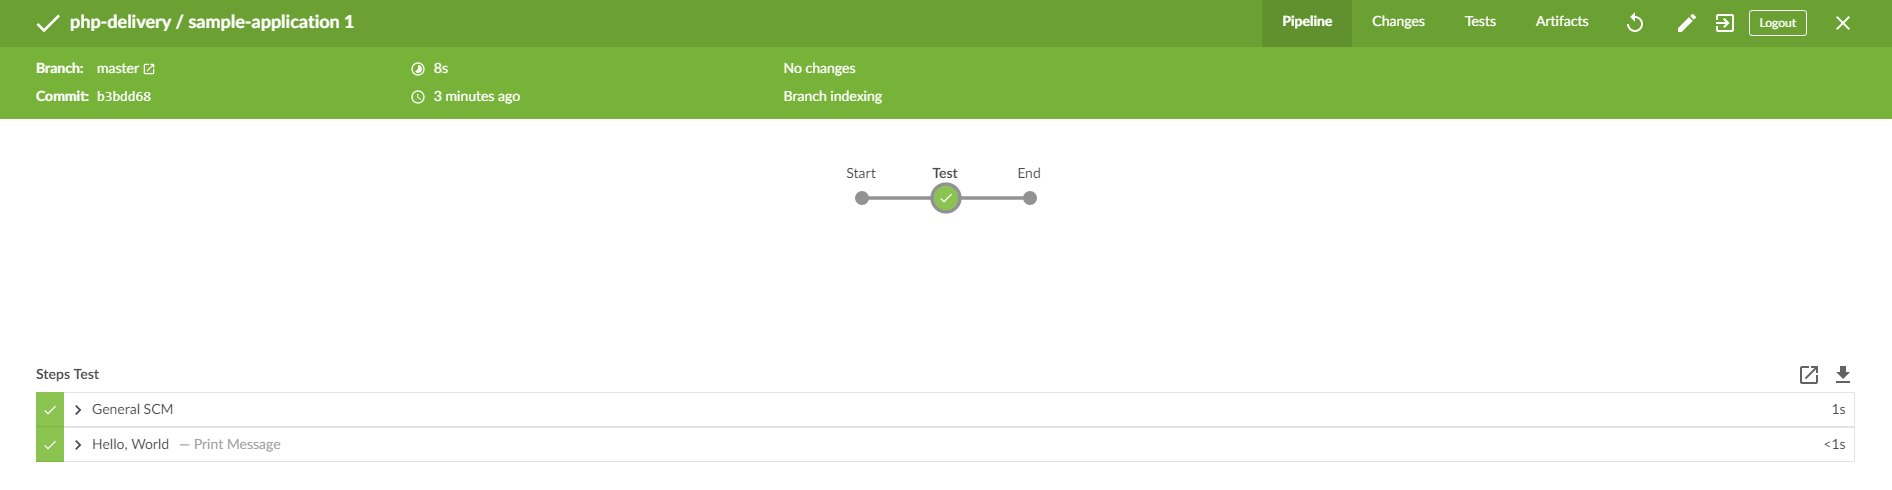
Because we have not added a Jenkinsfile to our sample application, BlueOcean is going to offer the interactive Pipeline builder. Pipelines can have multiple "stages" that execute in sequence or parallel. Add a stage called "Test" by clicking the plus-symbol to the right of the start node. After naming the stage, you'll see a list of "steps" on the right that can be executed during that stage. Let's pick "Print Message" and just have it print "Hello, World". Save your Pipeline (and allow BlueOcean to commit the generated Jenkinsfile to master) and a build will immediately start. Eventually, you'll see this:
A Jenkinsfile is test-based description of your Pipeline. The graphical editor is very nice, but the textual format isn't bad either:
pipeline {
  agent any
  stages {
    stage('Test') {
      steps {
        echo 'Hello, World'
      }
    }
  }
}
Until next time...
We're not done here, by any stretch, but we have a running Jenkins BlueOcean instance and our first build Pipeline. Next time, we'll:
- Authenticate to Jenkins via GitHub
- Configure our organization to let Jenkins know when contributions happen
- Create a minimal test-suite as an example
- Have Jenkins execute our test-suite when new pull requests are sent
- Have Jenkins prevent merging of pull requests with failed tests.
We'll continue setting all of that up in the next post. See ya' there!
Welcome to my blog!
I will be posting a lot of content over the next few months across a wide variety of topics including material like you've just read. I am an aspiring writer, so if you can get past my terrible grammar, I think I have a lot of valuable ideas to share with you. If you're interested, I would really like to reach out when I publish a new article! No spam, I swear.